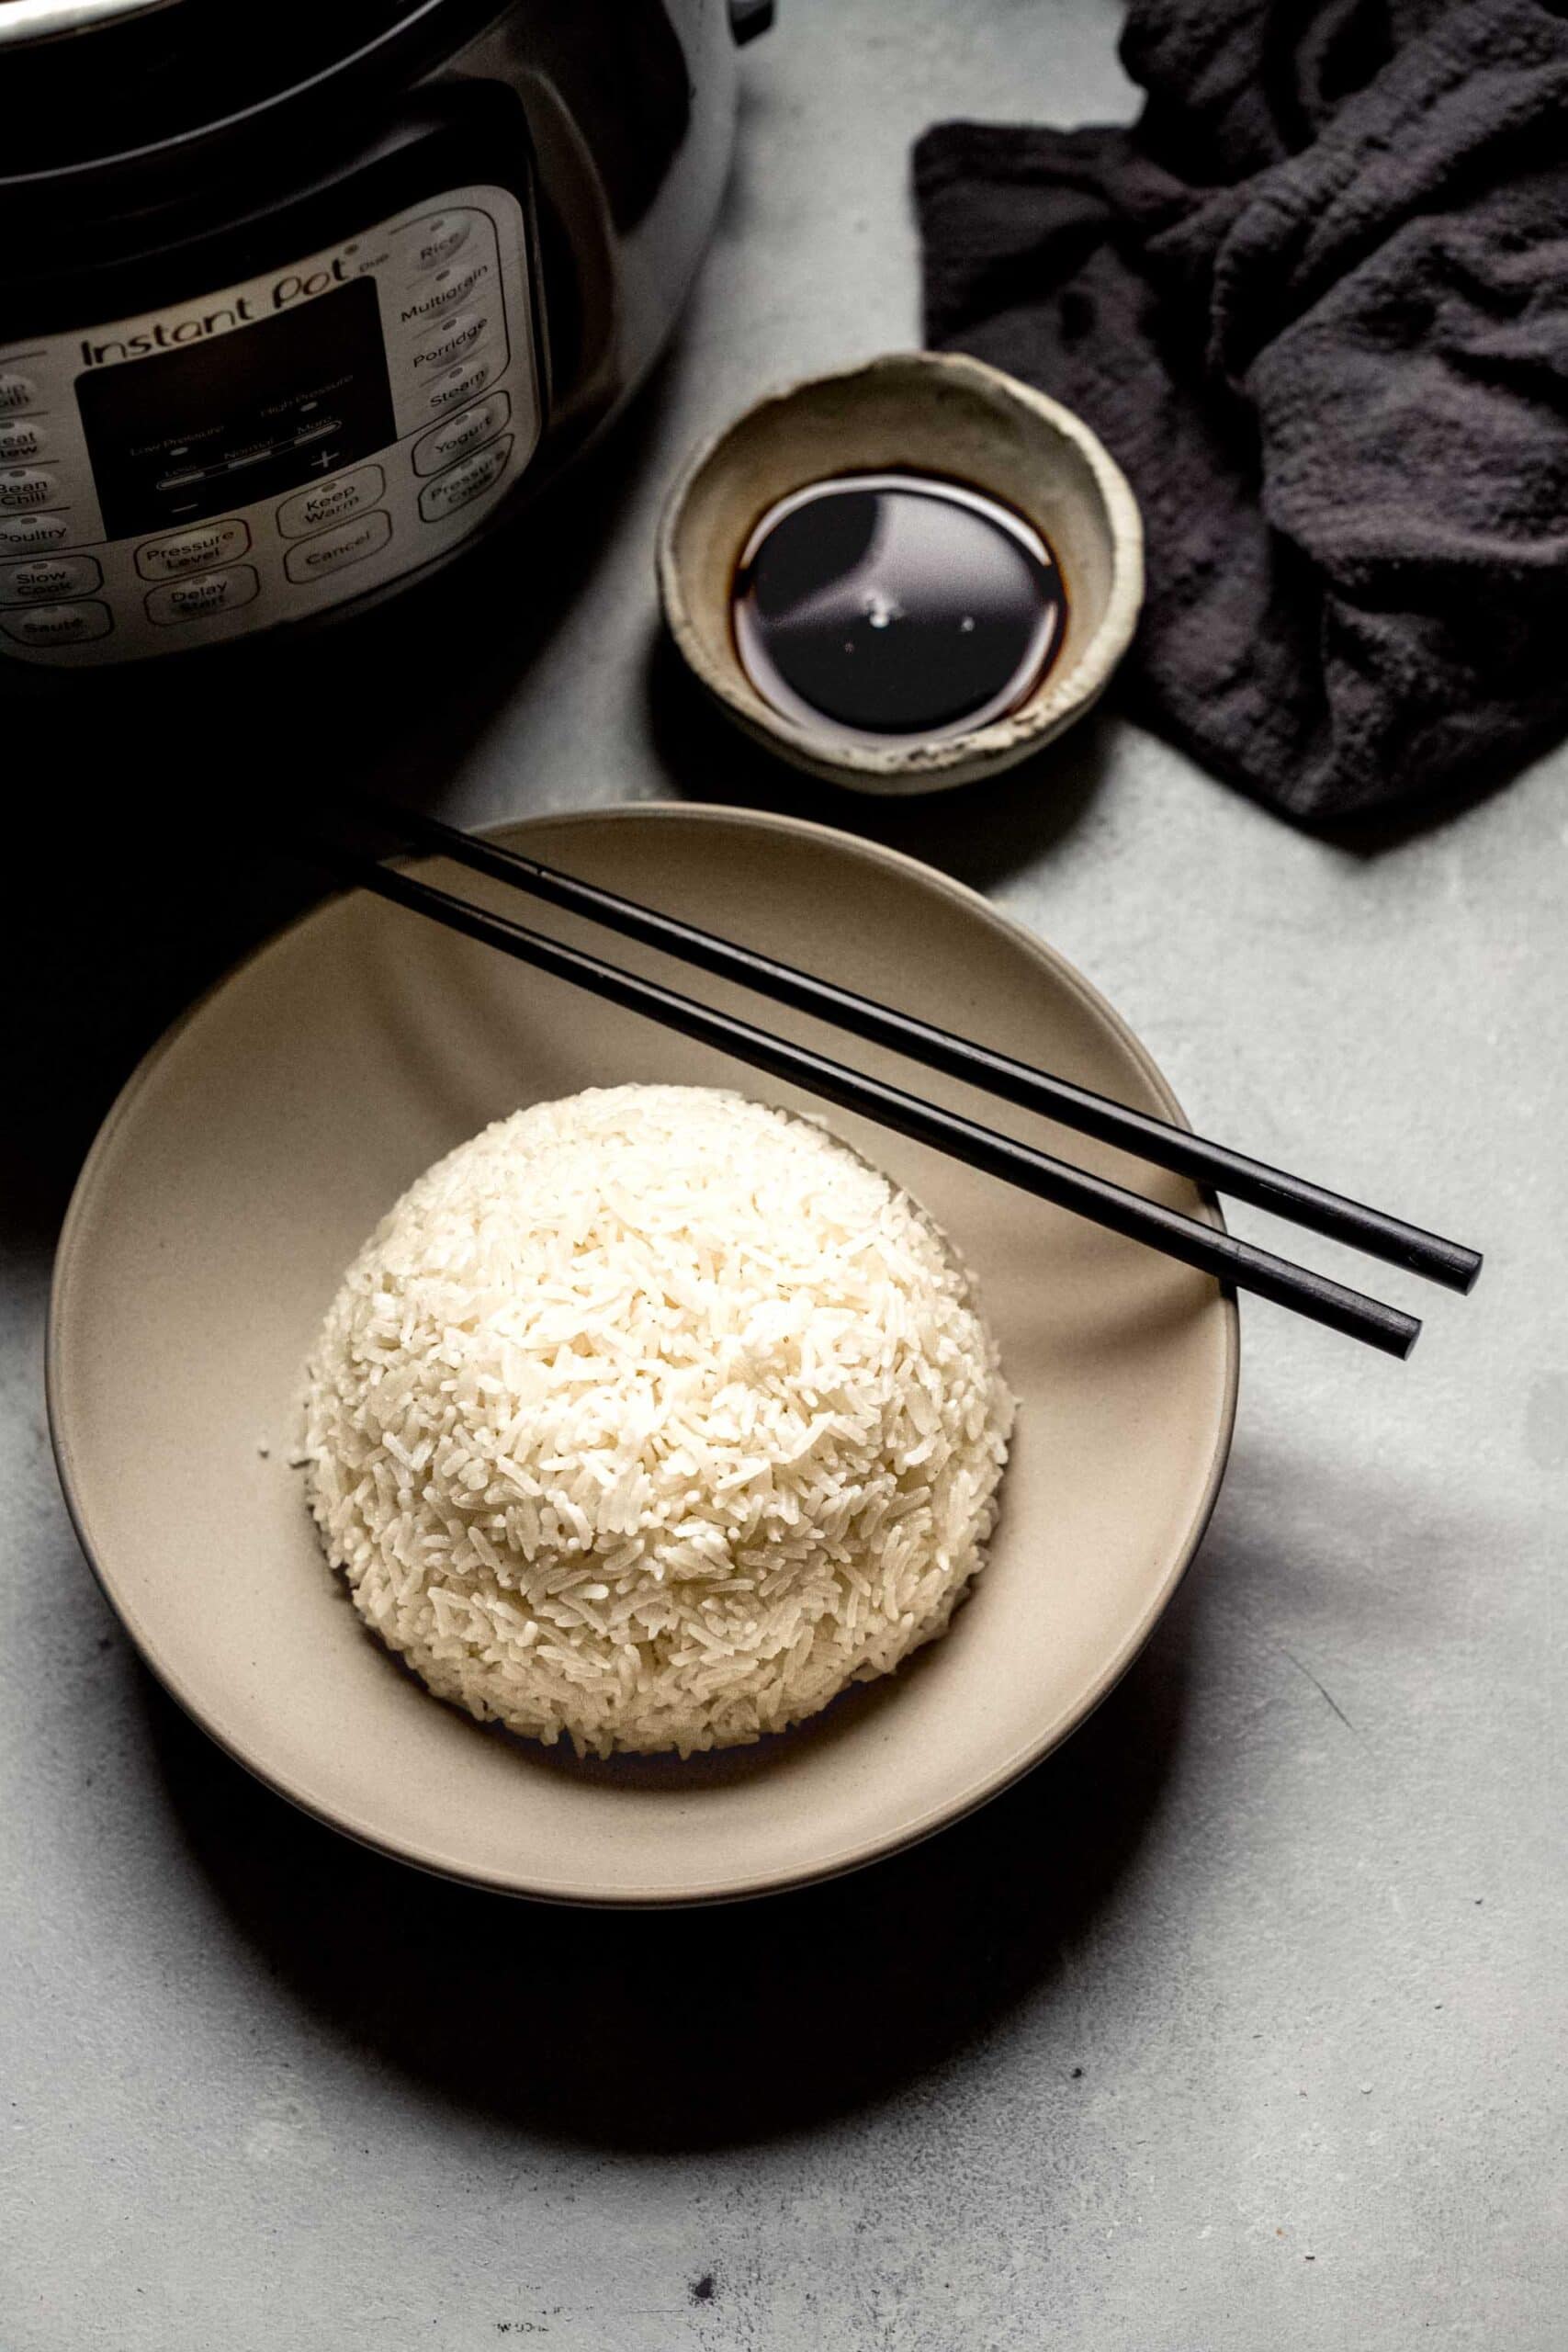

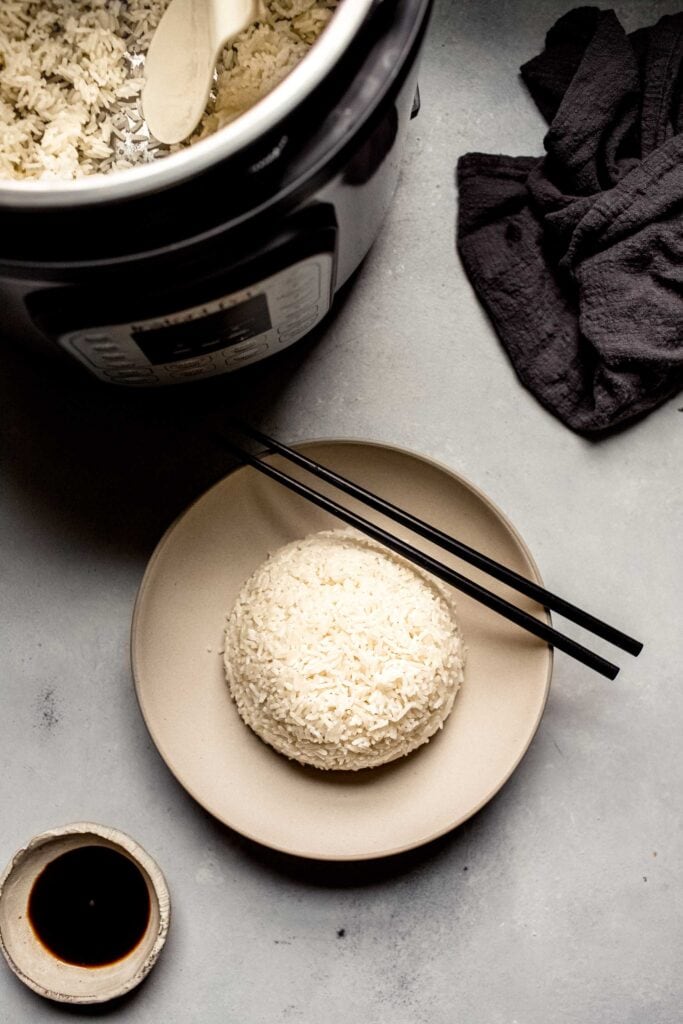
With this easy Instant Pot Rice recipe, you’ll see it’s simple to make fluffy rice with minimal measuring and perfect results every time. With directions for white rice, basmati, jasmine and brown. Plus, how to use the Instant Pot rice setting.
Want to Save This Recipe?
Enter your email & I'll send it to your inbox. Plus, get great new recipes from me every week!
By submitting this form, you consent to receive emails from Platings + Pairings.
Jump ToToday I thought I’d share with you my “method” for how to cook perfect rice in the Instant Pot.
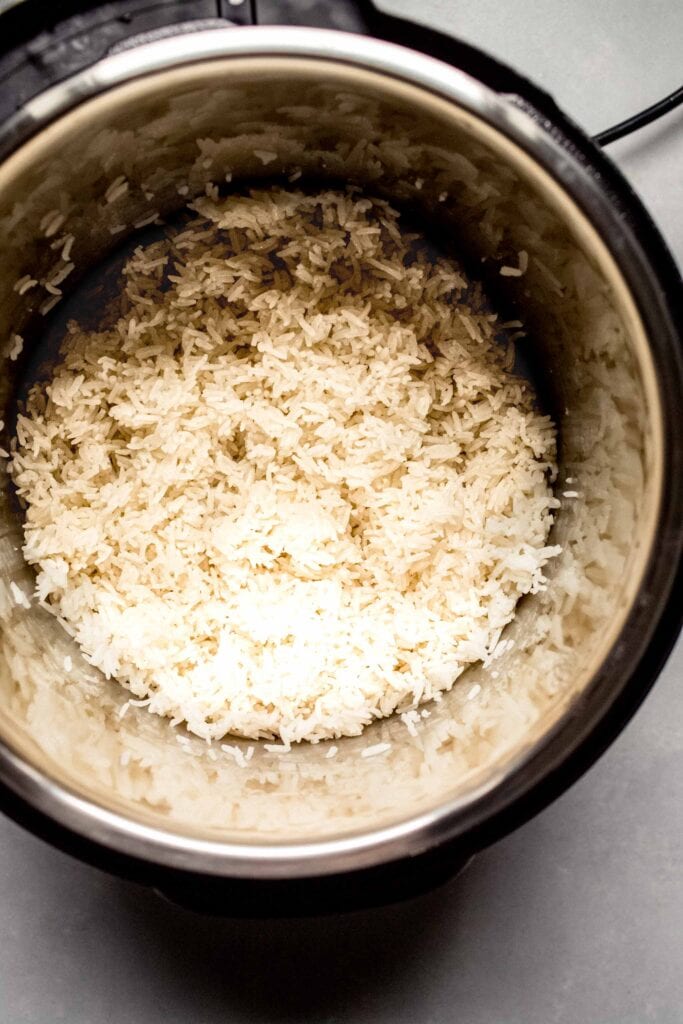
Cooking rice in the instant pot is easy, hands free and simple.
The reason for the reduced water is that the Instant Pot is more “sealed” than a traditional cooking pot, meaning less evaporation of water during the cooking process.
Total Time: Note that you still need to account for the time it takes for the Instant Pot to come to pressure, and then for the natural pressure release. It will take about 10 minutes for the pressure to build, and then we will let the pressure release naturally for 10 minutes too. So, in reality, you should add 20 minutes to the cooking time below.
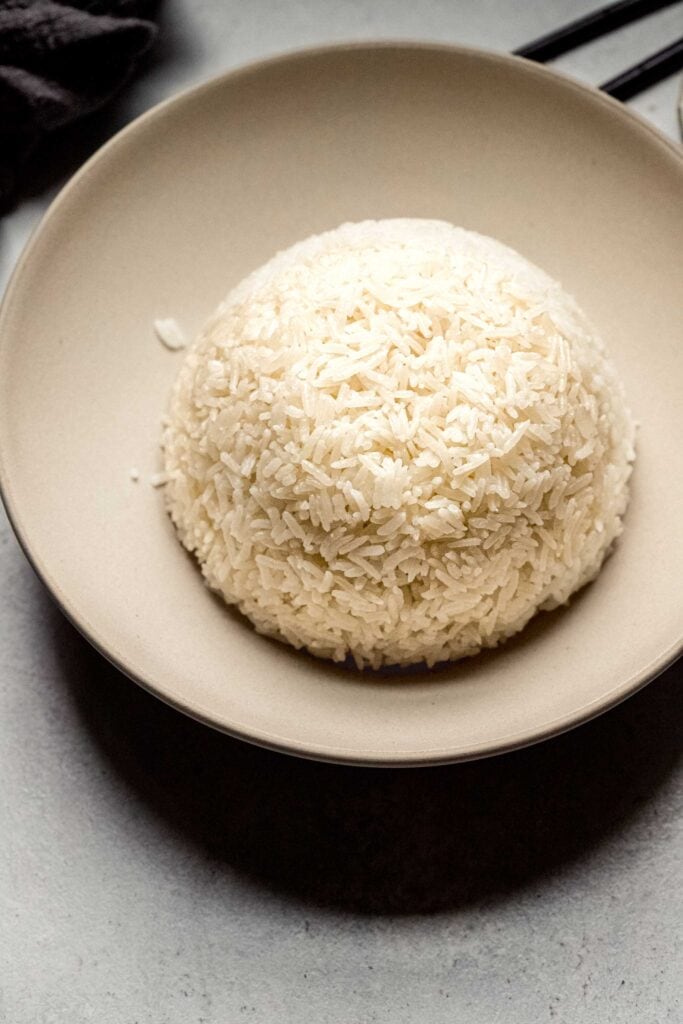
The recipe below is for cooking 1 cup of rice, which will yield about 3 cups of cooked rice. But the recipe can be easily adjusted using the recipe card below (just click the 2x or 3x button).
Depending on the size of your instant pot, you can cook the following amounts of rice:
Note: The water to rice ratio (1:1) and cook time will stay the same regardless of the amount of rice you are cooking.
Rice is fantastic served hot or chilled. Use a hot and fresh batch of delicious rice to go with:
You can also top your rice with one of these 15+ sauces for rice bowls.
Or, chill your rice to serve with:
Did you try out your instant pot rice button?
If you loved this post on how to use the instant pot rice setting, I would appreciate it so much if you would give this recipe a ⭐️star review⭐️! Also, be sure to snap a picture of your finished dish and share it with me on Instagram using the hashtag #platingsandpairings and tagging me @platingsandpairings.
For more great Platings and Pairings recipes, be sure to follow me on Instagram, TikTok, Pinterest and Facebook.
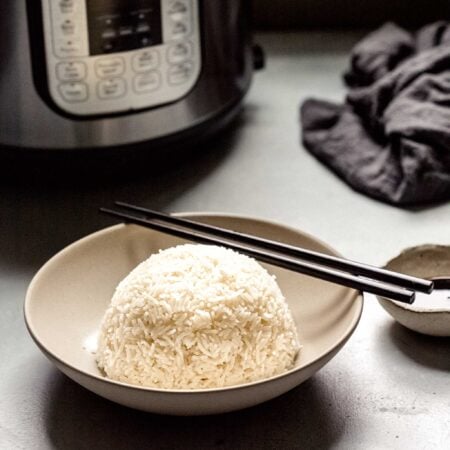
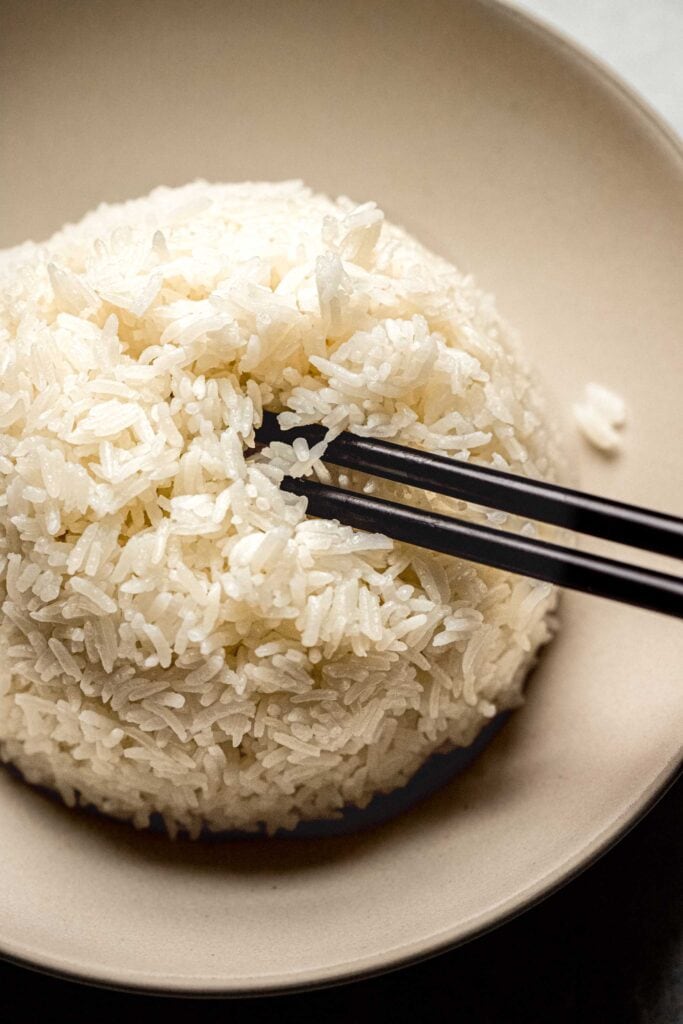
With these tips you’ll see it's simple to learn how to cook perfect rice using the Instant Pot rice setting. The result is fluffy & flavorful rice that’s easy to prepare with minimal measuring.
4.96 from 204 votes Prep Time: 1 minute minute Cook Time: 8 minutes minutes Time for pressure to build and release: 20 minutes minutes Total Time: 28 minutes minutes Servings: 4 people Created by Platings and PairingsLock the lid and set the steam valve to its “sealing” position. Select the “RICE” button (if cooking white rice) or follow the cooking chart below. Allow the pressure to release naturally for 10 minutes and then release any remaining pressure. Fluff rice with a fork and serve.
Calories: 168 kcal | Carbohydrates: 36 g | Protein: 3 g | Sodium: 5 mg | Potassium: 53 mg | Calcium: 13 mg | Iron: 0.4 mg
This instapot rice recipe was originally published in 2017. It was updated in 2022 to add new photos, and again in 2023 to add new content.
New to IP and having fun with it! Was suggested to me, by a seasoned IP cook, to cut down on pressurizing time, use the saute button to ” preheat” your IP while getting ingredients ready, when hot, hit cancel, add rice & liquid, set on high pressure for required time. Rice came out perfect. Reply
Hi, I realize your original post was a few years ago but am just seeing this. If you turn on sauté to cut down on pressurizing time won’t that affect how the food is cooked since it is beginning to cook as it gets pressurized? Thanks! I’m kinda new to this also! Reply
Barbara2020Hi Erin, I just bought an IP. Haven’t been able to get the rice to water ratio correct. My dad likes the rice soft but not mushy. I’ve always used traditional rice cooker and a 1:1 ratio and never had problems until recently. My rice cooker is old and gave up. My question though is about time. My IP has a rice setting and it defaults to 20 minutes. In that setting it doesn’t let me increase or decrease the time. I would have to use either multigrain setting or pressure cooker setting. Based on your blog total time should be 28 minutes? Reply
Hi Barbara – I would use the MANUAL pressure cooker setting on your IP. For white rice, the cook time is 4-8 minutes. If your dad prefers soft but not mushy rice, I would try it for 6 minutes. See how that works! Reply
Well… I love my instant pot, but you’re looking at about 2-5 minutes for it to come to pressure and with a 10 minute natural pressure release, your actually looking at about 20 mins altogether. Reply
I agree with you Al – I think that the most beneficial part about the Instant Pot is just the “hands off” aspect. Reply
Hands off and a reliably great sticky rice for whatever I’m making in my other instant pot insert like sesame chicken, beef & broccoli, etc. Reply
@ Al, my thoughts exactly! Not so instant after all — the ads conveniently don’t tell you about that pre- and post-cooking time overhead. I think IP is great for cooking meat, although since I cook for one, I am experimenting with cooking smaller quantities of 2 or 3 meats at the same time, so I don’t have to eat the same thing for a month (I live in a small apartment with a small size fridge freezer). If the Emeril Pressure Air Fryer unit came in a 3 quart, I would snap it up. Reply
Thanks! (.. for the reminder about the actual time it takes to build pressure not being included in the 8 minutes.) Reply
Don’t know what you mean with this “10 minute natural pressure release” shizz, it takes like 2 minutes, 3 tops. Probably still quicker than doing instant rice Reply
One for one water to rice ratio is wrong. Rice came out hard. Whoever wrote this is an idiot. 1 cup rice to 1.5 for instant pot. Only reason I clicked on this article was to get that ratio. My own dumb luck it was a retard. Reply
That’s funny “No” – This recipe works perfect for me every time and it seems many others agree… Reply
Erin, please disregard No’s posting. Your recipe is great! I have been cooking rice for years and have told everyone it is the best when made in IP. I came to the same conclusion on my own to have less water and coat the bottom of the pot with oil. I use about 1 tbs of coconut oil for 2 cups of rice and it gives a very pleasant fragrance to the rice and prevents it from sticking. And definite yes for the broth! I am planning to use your IP quinoa recipe! Reply
On your suggestion I’ve been using the coconut oil for a while now too, and it smells divine! The rice turns out great too.
I agree with No somewhat, I thought it needed more water. It wasn’t hard but a little dry. That being said, No, were you raised by wolves or just classless. A simple comment would have sufficed but “retard”, really. I bet your parents are proud. Reply
I have to agree with “no’s” comment. Not enough water, rice comes out hard regardless if it is white rice or brown. I have tried this with Botan Calrose, Indian Basmati, and shortgrain brown rice and it is clearly not enough water — hard and crunchy every time. A rice cooker is way more efficient and reliable, and if you have a good rice cooker (like a Tiger) with a “quick rice” setting, it will work just as fast. Reply
Erin – if your recipe doesn’t come out the way you expect it to, just a simple comment such as ” the rice was not cooked enough for me. I think I’ll try a 1 – 1.5 ratio next time”. No need to call people names. Be kind!! Reply
1 to 1 ratio was perfect for me as well. I don’t understand the “+” and”-“ buttons. My pressure shows high and normal but why would I change it?
1:1 ratio did t work for me either 🙁 ReplyI normally use Coconut Water instead of normal water. My husband doesn’t really like rice, but he loves the sweet coconut rice! Reply
Did you rinse the rice first? I wonder the residual water from rinse is the variable that is not explicitly stated. Not everyone rinses rice the same way and some leaves more water from the rinse than others. Reply
did you figure those settings out yet?Exactly. If people don’t rinse the rice, they should add 1 tablespoon of water per cup of rice. I follow the recipe and rince the rice thoroughly. I have had no problems with thus recipe at all!
I feed a big family so i did 2.5 cups of water, 2 cups of rinsed rice, 1/3 of turkey neck broth , soften butter && seasonings. My instant pot sets the rice selection to 10 mins, and my time doesnt count until the pressure builds. Reply
I’m sorry that you had a problem with this particular recipe, but it is not necessary to be rude and insensitive to others. Reply
Wow someone needs to be a little nice. Calling people idiots and retards is so childish. I’m sure you can find a better way to post. if you don’t like it or it doesn’t work for you try another way. Have a blessed day “No”. Reply
No need to use the r word or other names. If it didn’t turn out for you fine. Go find another recipe but it seems you already know the ratio. Reply
Dear NO-
Using this kitchen tool can have a steep learning curve. I have to add time and liquid due to altitude, hardness of water, and freshness of product. The 1:11/2 rice to water ratio
does not even work at sea level. This stuff is supposed to be fun. If you get crunchy rice add some liquid and more time. Try bringing something to the “table” (pun intended instead of hating on this author and her experience; for her this is the “perfect” rice. Reply
Thank you all for addressing the rude and uncalled for comment!! I can’t believe people still talk that way what a shame.
I followed the recipe ..I was a bit worried or nervous as I’m very new to IP cooking this was the second thing I made. It came out wonderful just right. I realize what some are saying as far as time.. but using the IP I don’t have to sit and wonder if my heat is too high too low if its sticking to the bottom.. don’t have to watch it . ..I’m free to do other things while the IP is doing its thing.. also I think that when you rinse the rice and the time that it has to sit in the steady pot while you let the pressure down naturally also allow for the continued cooking.. it’s like the finishing touch.. cant wait to try other rice recipes. Thank you for the recipe and tips. =) Reply
Relax dude. That’s the ratio it suggests in the actual Instant Pot manual. Stop internet trolling and being a dick to people who are just trying to be helpful Reply
Perhaps factors like: 1) Was the rinsed rice drained or still wet could affect the results 2) Even white rice can vary in cooking times from Basmati, to Italian, parboiled, Thai fragrant etc. 3) Everyone’s preference for rice is different, some like it separated like Basmati some like it sticky like Sushi rice. Even in the same family, I remember there were differences. Adjust it to taste, cheers!
I think you could have said this without making rude comments about the author. Your words say more about your deficits than those of the author.
I, for one, have used this recipe multiple times with great success. 6 min works for me. Reply
You should all try adding lemon to your rice – sometimes I add lemon juice and top up the amount of juice with water to the max amount of liquid you want. Or use lemon zest. Great with fish or chicken or whatever takes your fancy 😁 I also mostly use Thai sticky (Jasmine) rice. Everyone who tastes it loves it. Because I mostly cook for 1, I use about 1 or 1 and a half espresso cups raw rice. To this I add about half a cup of lemon juice and top up to make 1,5 cups liquid in total. Yum Yum 😁 Reply
Love the idea of lemon juice and would never have thought of it. Thank you!
This will be my first try using the pot and not an insert pot on manual pressure. Hoping this fixes it because the other comes out too gummy. And, it could be the type of rice. Reply
Thanks for the tips on cooking rice in an Instant Pot. Appreciated the water ratio hints and the timing for other rice. Nice to know that the IP is so versatile. Really like the fact that unlike other rice cookers you are not cooking in aluminum. Reply
Melissa BussoneI don’t have an egg button on mine. I’ve never been good at cooking rice and I had a girlfriend who intentionally would burn food so I would do most of the cooking. My friend Paul made her get a rice cooker when they became roommates because he told her that he wasn’t going to have her burning his pots and pans and he wasn’t going to cook for her. I got the instant pot Duo 7 in 1 multi-use pressure cooker. It is 6 quarts. I had originally tried to buy one off of Walmart and the one I got was $49 right after Thanksgiving and the one I had wanted was a 10 in 1 and it was only $10 but it looks like they had no intention of ever selling it at that price. The 10 in one obviously would be much better than the 7 in 1. Looking forward to finding recipes my rice cooker didn’t come with any utensils or recipes I guess you have to kind of go and look online to find them. Reply
I have a rice cooker, and can’t imagine going back to making rice in a regular pot because it’s so nice to put the rice and water and just press a button and then focus on making the main components to go with the rice instead of thinking about the rice Reply
The Instant Pot works just like a rice cooker – So simple! Reply What’s the max amount of rice I can insta pit please Erin Reply Monique Hogan
I hate my rice cooker! Was do glad to get my IP and make rice in it! My rice cooker is a good one, but spits gooey rice juices EVERYWHERE on the counter, scary with it being electric. Great recipe thx!! Gave the rice cooker to my sister. 😂😂 Reply
Heck yes!! Love the Instant Pot and it is SO fast for rice! Hadn’t thought to use oil, I should try that next time! Reply
I think I’m the last person on earth to jump on the Instant Pot bandwagon. I’m a low and slow gal through and through I guess. Though I am crazy curious about this whole world of cooking! I’ve been very very tempted to look into one after reading recipe after recipe from this miracle appliance! And ironically I was thinking to myself just last night as I made some fried rice for my kids that I can cook a mean meal, better than your average joe, but I simply cannot cook perfect rice. I either burn it or make it soggy. Seriously, every time! And no, I don’t own a rice cooker either. Reply
Rice is just SO tricky – I think it’s all about getting that perfect balance between rice and water! Reply
My rule of thumb for non-mushy rice, almost drier, rice is a 1:1 ratio. Reply I followed the recipe and the rice came out crunchy….? ReplyHmmmm… I’m sorry that happened for you DC. One thing it could have been is that the Instant Pot was not sealed properly? Did the valve pop up during the cooking process? Reply
The recipe doesn’t call for enough water- it should be a 2:1 ratio of water to rice. I had the same problem the first time, doubled the water, and it came out great on the second. Reply
Yes, what Ekho said about the ratio. The instructions on the bag of rice say 2:1 ratio, so I was really doubtful when I read the article saying 1:1 or 1:1.1. That’s instant rice territory, not regular cooked rice.
Actually, I mentioned this in the post. It is actually a 1:1 ratio in the Instant Pot because there is no evaporation in the Instant Pot like on the stove top. I’m curious Mark – Did you actually try the recipe? The 1:1 ratio works perfectly for me every time, so I would be interested to know if it’s actually not working for you…
My rice was also a little crunchy with the 1:1 ratio- but I didn’t pre-rinse the rice. I’m curious if this could be the problem people are running into.
You’re not the last one LOL! I just purchased mine about three weeks ago and it is October 2019. Reply
I have had an InstaPot for over a year, but I definitely haven’t used it to its full potential yet. I need to work on that. I’m with Pech though – I can’t imagine life without my trusty little rice cooker anymore. Reply
rice should be rinsed to remove the extra starch–water through the rice in a strainer until the water runs clear–the wet rice to the IP—the reputable cooking advisors have used about 1 to 1.25 ratio for awhile now–good luck Reply
Love the tip for adding oil and how you lay out the different times for different kinds of rice. So helpful! Reply
I have yet to jump on the Instapot train but it seems that everyone I know has one! I’m planning to share your recipe with those folks. And I’m making rice in my rice cooker tonight and will try a smudge of oil just to see if I can lessen the sputtering and spitting. Often times, I just put it in the sink to cook in order to reduce my post-rice cooker cleanup. Reply
It took me a while to jump onboard the Instant Pot train, but I’m definitely a convert now! ReplyI have brown basmati rice. Do you suggest going with the longer time frame or basmati cooking time? Thank you! Reply
Hi Angie – I would cook brown basmati rice for the same amount of time as traditional brown rice (22 minutes). Enjoy! Reply
On hi pressure or low pressure? Reply You should set the Instant Pot to high pressure. Reply Michelle G My Instant Pot shows low pressure when I click on the “Rice” settting Barb Baxter
I just tried this with a pearl rice, I set it for 6 min and it was a little over done, so will try 5 min next time. Out of curiosity, what kind of rice would you use with the rice setting, which is 12 minutes, and can’t be changed. Reply
Hi Barb – I’m not quite sure why the rice button is there, because cooking times can vary SO much! Here’s a helpful cooking chart for different grains in the Instant Pot. Reply
I am confused about the Pressure button. When I turn on my Pot the pressure is default to low. I have tried cooking my rice without changing it and the rice is watery. If I change it to High the then I get wonderful rice. I notice it is not mentioned in the recipes to change the pressure setting. Is my pot not set up right? I live about 6,000 ft. Is that the reason for the need for higher pressure. Any suggestions would be helpful. Reply
Hi Lisa – I would always cook on HIGH pressure. I hope this helps! Reply Mine is default low pressure alsoIs there a trick to making rice and chicken strips at the same time?
I love to cook my meals all together and at times I will use chicken broth instead of water to cook my rice in. Any tips?? Reply
To be honest Dawn, I haven’t tried it… Are you wanting the chicken strips separate from the rice? I would maybe put the rice below and then insert that metal basket upside down so that the strips are lifted off of the rice. Like, place them on that metal sling…? I have a feeling the chicken may cook a lot faster than the rice though, but perhaps with the steam, it won’t dry out…? I think I need to put this to the test! Reply
You could saute the chicken first, i do it with onions and a little fajitis seasoning, i then just add my water and rice and put the cooker on rice and let the PO go. Reply
That sounds really yummy Helen! ReplyDo you put it on manual to change it to 8 minutes for white rice? I put it on the rice but it automatically does 12 minutes not 8. Or there’s also the multigrain that does high pressure instead of low pressure and you can adjust the minutes. Is that the one you use? Reply
Hi! Turn the Instant Pot to Manual and then adjust the time. Hope this helps! Reply Hit the rice button again and it will cycle through all the cooking options. ReplyOkay, so I am brand new to the Instant pot and I am wondering about the water/rice ratio. I always use brown rice but do 2 cups water for every cup rice. Is it really one/one? If so, why such a difference? Reply
Hi Alicia – In the Instant Pot, there’s very little evaporation of the water. That’s why the water-to-rice ratio is so different. Reply
If I double the recipe, do I double the cooking time? Thanks! Reply No need to double the cooking time Anna – It should take the same amount of time. Reply Bekah SouthernTha KS for asking this question, I was about to until I read through the posts. Trying now with a double batch in high pressure for 10 min. Wish me luck Reply
Bekah SouthernHi
Is it a straight normal cup measurement for water and rice or a normal cup for the water but a rice cup measure for the rice?
Thanks:) Reply
I am thinking of getting a 8 qt instant pot but when I cook rice I only need 2 cups usually. Would two cups of water be enought to start the pressurized process in the 8 qt pot? Or should I just get a 6 qt? (I really wanted the extra capacity for cooking larger portions although there is only 2 adults and 2 kids in the house). Reply
Hi Yolanda – This should come out just fine when using the 8-quart Instant Pot too. Reply Linda White
Thank you so much for this recipe. It turned out absolutely perfect! I am looking forward to trying more of your recipes. Reply
I like adding minced garlic into my rice after it’s done cooking – but that’s with a regular rice cooker.
Do you think adding minced garlic into the InstaPot, with the rice and water before cooking, will be okay? Reply
That sounds great Crystal – I think that should work… I’d love to hear back if you try it. Maybe you could try leaving the cloves whole? They may get softened and then you can mash them into the rice…? Reply
Hi! I just got my IP and haven’t cooked rice yet….this might be a dumb question but, can I use Instant rice? Reply
Hi Joey – I would not use instant rice. Reply Roxanne Snegirev How many cups of rice can u cook in a small pot? ReplyNot sure what’s wrong but with rice + vegetables, with RICE button selected, cook time takes about 30-40 minutes and seem to defeat the “instant” part of this instant pot. Why’s that? Reply
I would bypass the “RICE” button and just use the manual button – Hope this helps Chris! ReplyYeah, that’s the biggest secret with IP; everyone hypes up the quick “cooking time” but forgets the “total time” is way longer. This recipe took me 35 minutes: 15 minutes for IP to “warm up,” 10 to cook (used “Rice” button), then 10 to release pressure. Where’s the time savings over a normal rice cooker? Do you have to cook a huge amount? At a minimum, could you please revise your noted “total time” on this recipe to at least 30 minutes? Reply
I”m confused about the directions “let the pressure…release naturally” . What does that mean? There are two places for the pressure thingy to be. Is it on the pressure side or the release side?? Reply
Almost every recipe I see for the Instant Pot ignores the wait time for the pressure to be released. WHY do people not add this to the complete time of the recipe. Reply
Because the wait time varies greatly. If the ingredients are frozen, water is cold … it will take longer for the pot to come to pressure than when the ingredients and pot are hot. The time to pressurize also varies with the volume of ingredients in the pot. Reply
One way to avoid all the rinsing: sauté the rice in oil first. I set my instant pot to sauté and when it’s hot I add a couple tablespoons of coconut oil. Add the rice and sauté for a couple minutes stirring the rice. Add the water, close the IP and start the pressure cooking process. Not only does the rice come out perfect with separate grains, you convert a small amount of the starches that would have made it sticky into “resistant starch”. You can’t digest resistant starches so they don’t contribute calories to your diet, but more importantly the gut bacteria that keep your colon healthy and operating correctly need that resistant starch to survive. Feed your gut! Reply
Andy, I like this idea, as I don’t want to take the time or water to rinse the rice. Do you still use the 1:1 rice to water ratio? Reply
Why do so many recipes on the internet have to start out with a story or drawn-out explanation? I’m not interested in seeing all of the pictures or any backstory behind it. I just want the recipe and the instructions. Anything else is a waste of time. I’m not trying to be mean, it’s just way too often that this happens. I can’t be the only one who feels this way. Reply
No worries Joshua – If you don’t feel like reading the whole post, there’s a handy button at the top to jump right to the recipe. Cheers! Reply
First, thank you for the recipe. I’m waiting to receive my IP, so I’m gathering recipes while I wait! Second, thank you SO MUCH for the handy button tip! I’m not a foodie, so I’m not interested in pics. I would just scroll down until I could find the recipe. Never noticed the jump button. You have saved me much scrolling time! Thanks! I look forward to following your blog. Reply
Thank you so much Joanna – I’m so happy that’s helpful for you! Reply
I’ve mastered chili and pork carnitas, but needed to try rice and grains. Thanks for this! I followed exactly and the rice was perfection. I’ve never been able to get it to the right texture on the stove top and never bought a rice cooker. So this is great. If folks are wondering, I just used the Rice Button on my IP. When it was done, I set a timer for 10 mins and just took the lid off. Thanks again! Reply
I just got my ip don’t know how to do rice in it? can you tell me? Do I use extra water in it or just in the rice? Reply
JENNIFER LIEBERENZ I am so lost! lol. I can’t find the “time chart” mentioned? Was it removed? ReplyHi Jennifer – There is a timing chart right below the recipe. It’s not really a “chart” per se, I should probably change the wording. Reply
Beautiful pictures! Reply
This is a solid recipe. No complaints on the quality. But I agree with a few other users. The cook time should say 8 minutes, but your Total Time should be realistic and not 8 minutes. It should be the pressure time, which could be another 10 minutes, then another 10 at the end for natural release. So why not say 25 or 30 minutes for Total Time. Its the same story with anything else you cook in the instant pot. You always need to build in an additional 10-20 minutes for the pressure to build. Reply
I need advice….hosting dinner party for 10, I have a 6-qt. IP, how much rice should I make, and for how long in IP?? Thanks Reply
Hi Jan – I would cook 3 cups of dried white rice. It should take the same amount of cooking time. Hope this helps! Reply
This recipe for Instant Pot rice came out perfectly for me! I’ve tried it with brown and white rice and they were both amazingly fluffy! Reply
Hi! Do u adjust the water for brown rice? Typically in my rice cooker (which just broke so I’m gonna try the IP) I use more water for brown rice vs white rice. Thanks! Reply
Hi Rosa – I do not adjust the water. Because it’s cooked under pressure, much less water is lost during the cooking process. Reply
I’m interested in making coconut rice. Is the recipe 1 can coconut milk to 1 cup of rice? Reply Hi Monica – I’ve never tried this, but here’s a recipe for Instant Pot Rice with Coconut Milk. Reply
Hi! I followed the directions exactly and it came out sticky rice(which is good to know for future recipes) I didn’t see that you had to put in manual mode lol. Thanks for sharing! Reply
This just isn’t coming out quite right for me. I feel it needs a bit more water… or something. I’m use to making rice in a microwave steamer and it comes out great. This seems like the texture is a bit too hard and the rice seems very sticky. A weird combination. Maybe this is normal for pressure cooked rice? I’ve tried it twice and did it exactly as you instructed. I rinsed under water until it ran clear, dumped in my 2 cups of white rice and 2 cups of water with a bit of salt and oil, sealed it up and put it on High Pressure for 8 minutes. I let it naturally release for 10 minutes then opened up the vent to let the rest of the pressure out. Twice I had the same results which weren’t serveable in my opinion. Any suggestions on how to tweak this? Reply
I’m even later to the IP game than you are, as I just bought mine a few weeks ago for 41% discount on Amazon Prime day. The least expensive it has ever been previously is 30% off. So I figured that I can’t lose. After using it the last few weeks, I have to say that I reverted back to my slow cooker. We eat only grass fed/pastured meats and the IP just doesn’t get the falling off the bone, fork tender like the slow cooker. However, what it does do very well is cook hard boiled eggs and rice. So if that is the primary use of the IP, and for what I paid, it wasn’t a bad price for a rice cooker/egg boiler. I bought an egg insert that lets me make 14 eggs at a time. I had recently seen another insert that can fit a few more eggs, although 14 is fine for our small family. All I could do on stove top was 6, and they were always very hit or miss as to whether they would be overcooked or if they were less cooked but I couldn’t get the peel off without losing half the white in the process. I’m still trying to tweak the cooking time with the IP to be more of a medium boiled egg. But even when the yolks have been too liquidy for me (but my husband will eat them), the eggs still peel well. So that is a win. I also used to stove top cook my rice and it would be ok, but more on the mushy side. When I cook rice in the slow cooker, it is cooked and fluffy, like restaurant rice. So for the price I got the IP for, if I just use it a few times a month for rice and eggs, that’s fine. It does seem to make a nice chicken broth as well, but the chicken itself comes off the bone better making it on the stove top. But I have had times this summer with camp schedules where I just don’t have hours to sit at home and babysit a pot of broth, and have resorted to the IP (but will go back to stove top once our school year schedule starts and I can plan a day at home each week to make broth). My IP model does NOT have an EGG button. So that’s interesting that you have a model that does have one. Reply
I saw this comment earlier but it wasn’t replied to. You say to use the “rice” button for white rice, but that cooks on low pressure. For your cooking chart on manual, are you still using low pressure, or high pressure? The cooking manual doesn’t specify either. Reply